Thinking of starting up a podcast? They’re incredibly fun and informative for your subscribers. You’ll fall in love right away, I guarantee.
It’s amazing how easy the web has made it to have your own little show available to the world.
Even if you don’t have an audience at the moment, it’s a great time to get your feet wet so when subscribers start coming, they’ll have a whole lot of great content to catch up on.
Podcasting is getting more popular every year, especially since the internet has flooded people’s attention so much that readers like the comfort of taking in information on a different (and refreshing) format than a mundane computer screen.
Your episodes can be listened to while driving, traveling, working out, or even while lying in bed.
I’ve gotten plenty of emails from listeners who love going to sleep at night soaking up information while they drift off to sleep or while driving to and from work. It’s a passive format that can be taken in while multi-tasking, which few other formats can do.
The really neat thing though is you can start podcasting with relative ease; all you need is a microphone and a topic to discuss.
However, if you want to put something together that truly sounds professional, you can invest in a few pieces of equipment and believe it or not, sound like you’ve got a top-notch studio in your basement or garage.
I’m going to save you a lot of time here, because I spent countless hours researching equipment when I started my podcast, and if I only had this info at my disposal I would have thanked the author profusely.
Is Good Podcast Equipment Expensive?
When I first wanted to start, I did some basic internet research on what equipment is needed and how to put everything together. What I found were mostly podcast guru’s who promote certain equipment — but seemed to be overkill (and pricey).
I’m financially capable to spend thousands on equipment if I wanted, but being an amazon junkie, I relish in finding products that perform well yet are priced less than their popular counterparts, and that’s exactly what I did when building my own mini portable podcast studio.
Generally, the guru’s will recommend using mixers that can run into the $400 and $500’s, recorders that are $200 and over, stands that are $140, compressors that are $130+, and microphones that are $330! And you’ll spend close to $100 in cables as well to run all that equipment.
I thought… crap… there’s gotta be something cheaper that will sound great, because no way in hell was I going to shell out thousands of dollars just to make my voice sound fancy.
Eventually I found equipment that was much cheaper than the typical recommendations, yet still produced incredibly good quality. I’ll show you everything you need and at the end I’ll link you to all the stuff I personally use and recommend.
One thing to keep in mind is that podcasting can be done with just a simple microphone and computer, but if you’re serious, you should consider investing in a few key pieces of equipment so that you don’t sound like you’re talking through a potato.
I’m going to work backwards, starting with the finished production and working down to the final key component, the microphone.
File Hosting
If you want people to listen to your podcast easily, you’ll need to distribute the file for streaming or download, and as your audience grows, bandwith will become a serious issue.,
It’s best to subscribe to a podcast hosting service that’ll make sure no matter how big your audience, they’ll always be able to listen to you whenever they want.
Two main choices of services are blubrry and libsyn. These are the dominant hosting services and I believe most guru’s recommend libsyn, however, I really liked the name blubrry so that’s what I chose. I couldn’t be happier. I think both services serve their purpose and you can’t go wrong with either one.
Works flawlessly, and looks delicious to boot.
Blubrry has a truly awesome wordpress plugin called power press that lets you easily upload your finished mp3 file right into a blog post. It’ll automatically display it in the post as a stream and for download.
It even uploads it automatically to itunes, where a lot of your audience will be looking for it.
Blubrry even shows you how many people download each episode and where they come from and everything.
File Formats and Production
File format is important because the data is going to cost money and you want to keep the files as small as possible yet retain good quality. In the end, roughly one minute of audio should be about 1MB in data.
Your finished format must be in MP3 format, but it’s a good idea to record first in the highest quality possible and then compress it down to an MP3. This will give you a nice clean sound when finished.
I always record everything in WAV format, then convert it to MP3 using audacity (download it free here, using the free ‘lame mp3 encoder’). Once it’s converted to MP3, I edit it in Camtasia where I can pump up the volume and cut out anything needed, but you can do this in audacity for free (or in adobe audition if you have that).
I like to go through and edit out dead space, unecessary chatter, and any “you know’s” or “umm’s” possible. You don’t have to be anal about it like I am but I personally like to clip out as much junk as possible. It’s your show, do you what you want!
I also sometimes add my intro and outro after I record, but if you want everything to be easy, I’ll show you how to record it live when we get to ‘mixing’ shortly ahead.
Recording
You can record straight into your computer from your mic, but I personally don’t trust it. God forbid your computer lags or something happens and it clicks off or whatever… and you probably know that everything will work fine until you really need it to… then it acts up; so I record to a separate device.
A lot of guru’s promote the zoom h4n, but I use the cheap version of it which costs half as much and sounds just the same. It’s the zoom h1 (linked at the end). It records so clearly I sometimes have to wonder if I’m listening to a recording or real life.
Once recorded, I then transfer the microsd card over to my computer (or connect it via usb) and transfer the file to the computer where I convert it to MP3 in Audacity.
Mixing
A mixer is a piece of equipment that isn’t required, but it’s really handy to have. A mixer is a device that can take multiple sound sources and ‘mix’ them together into one final audiostream.
For podcasting, a mixer comes in handy because you can control the output easily while recording, and if you have multiple mics (guests for example) you can regulate everything using dials or sliders so that someone speaking loudly can be lowered and someone speaking softly can be turned up.
Mixers also allow you to bring in a guest over the phone or skype, so that you can conduct interviews or have guests without them being in the studio. This requires a somewhat tricky setup called a ‘mix minus’ so that the speakers voice doesn’t get looped back into the mix twice.
Another cool reason to have a mixer is that you can input your smartphone, ipad, or tablet,or even another computer which I use to play my intro or play sound effects when needed. There are ‘soundboard’ apps available all over so that you can play recordings with the press of a button.
Most guru’s will recommend using “Mackie” brand mixers, and I’m sure they’re very nice, but I’ve found that behringer makes a great mixer for much less, and has more features on cheaper models to boot.
One thing you really want are sliders on the mixer. I almost bought a mackie that didn’t have sliders and boy would I have hated that.DO NOT buy a mixer that doesn’t have sliders. Sliders are nice because while you’re recording you’ll want to quickly adjust levels and sliders let you do that really easily compared to knobs.
The most awesome podcasting mixer you can buy that doesn’t cost a fortune is the berhinger BEHRINGER XENYX X1204USB.
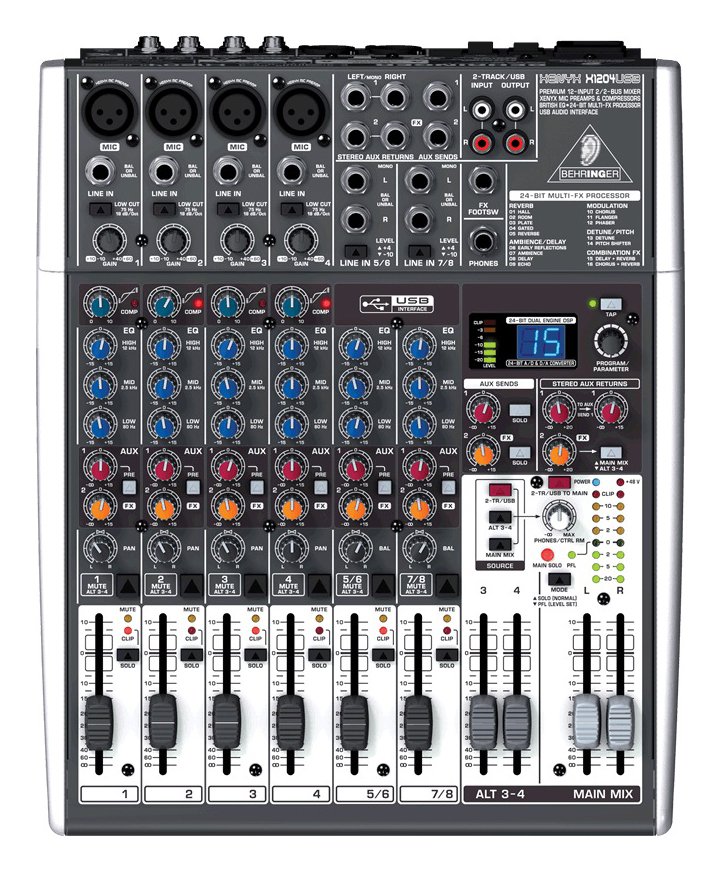
Don’t worry, it looks scary but it’s easy to use! I’ll give you a direct link to it at the end.
I LOVE this thing.
I really love this mixer and you’ll be hard pressed to find anything better for the cost; it’s worth every penny. If you’ve never used a mixer before (I hadn’t!) it may seem intimidating with all those knobs and buttons but you’ll appreciate what everything does once you learn how to use it.
90% of it is just repeating controls; so if you understand one column of them, you’ll instantly know how the other columns work.
This mixer is really cool because it has virtually all the features you need (and a lot more) built-in. Other mixers will often require you to buy separate pieces of equipment (like a compressor/limiter/gate) which introduce new problems and cost, but this one has it all inside itself.
You can do “mix-minus” so that you can bring in people over skype as guests, it has sliders, it’s lightweight and portable, and is extremely quiet, because nothing sucks more than listening to someone and hearing static and noise in the background.
One of my favorite features of the mixer is the compressor. Let’s talk about compression for a moment:
Compression
Compression is something that will really make your voice sound like ‘broadcast’ quality. When we talk, the volume of our voice generally goes from quiet to full volume, then back down, but a compressor makes it all evenly loud. It makes the voice sound ‘punchy’. You would normally buy a compressor as a separate piece of equipment, but the behringer mixer I recommend has it built in, where you can simply turn a dial to heighten or lessen the amount of compression applied. I turn it up pretty high, usually 7 or so.
My voice in real life is fairly thin and nasal, but compression, along with the EQ bass, mid, and high controls, gives it a much more beefy sound.
Limiter/Gate
At the guru’s suggestion, I bought a limiter/gate but honestly I never use it because the behringer mixer is just so darn perfect without it! A limiter/gate is a device that cuts out low volume static and also limits anything coming across too loud, preventing distortion. What’s funny is that it actually created more noise!
If you’re considering buying one, you probably are able to fix the problem using your mixer instead so don’t rush to add another piece of equipment right away. With new equipment comes not only more cost, but also noise and more attention to controls. Not good for the solo podcaster.
Output
The behringer xenyx1204usb comes with a usb output so you can run everything right into your computer for recording, which few mixers at this low price point offer. Or you can easily record out to a recording device just as easy using auxillary outputs.
Microphones
The microphone you use will likely be the most differentiating factor in the quality of your podcast. No matter what kind of fancy software or filters you run your production through, if the mic sucks, your podcast will sound like an amateur.
I guess you could start podcasting with one of those headset mics if you’re strapped, but if you can invest a little money into something better it’ll be well worth it.
For my webinars and video recordings I had been using the blue yeti mic, which produces great quality, is very popular, and has a lot of control over how it picks up sound, but it’s not the best for podcasting. It was a condenser mic, and those aren’t that great for podcasting.
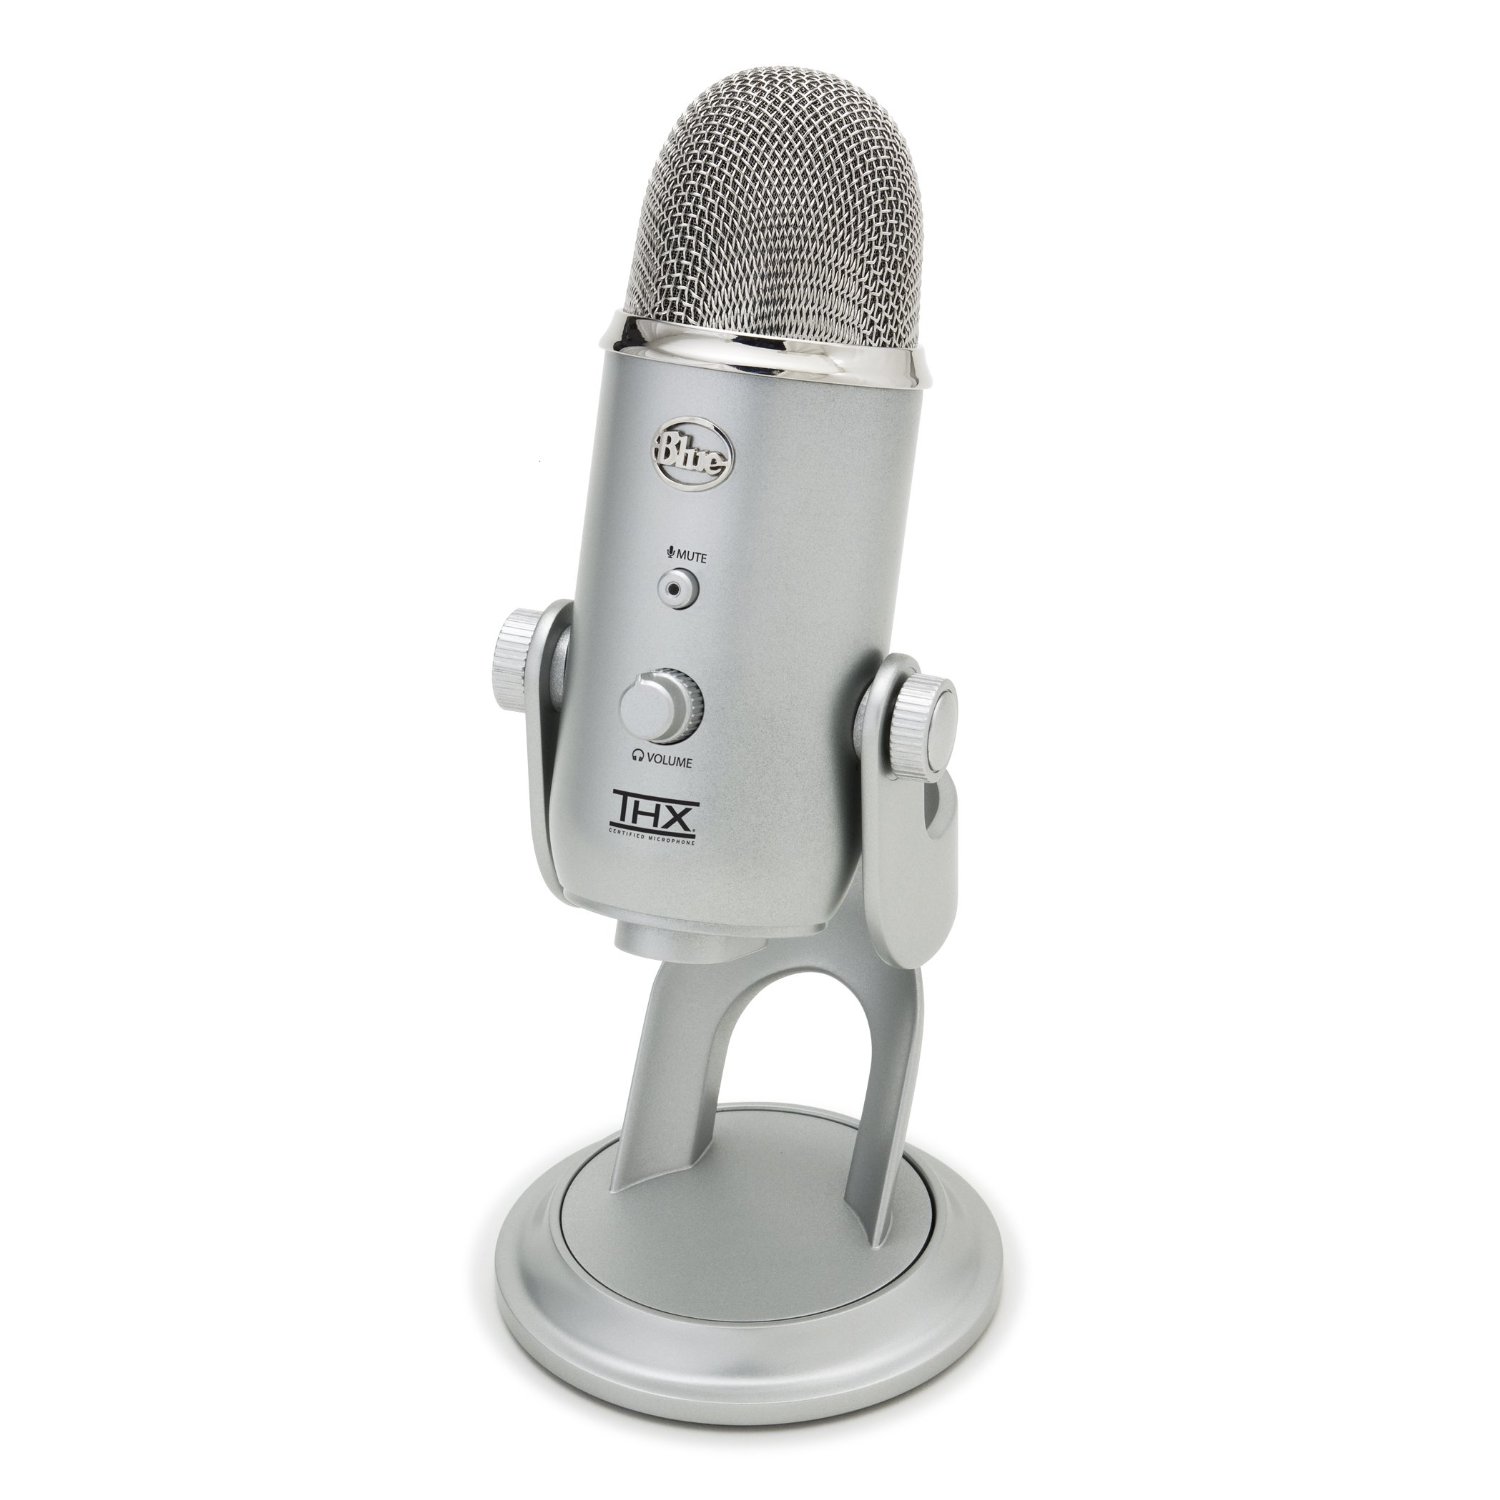
The Blue Yeti. Awesome Mic, just not the best for podcasting. Picks up too much sound and room echo.
You see, mics come in two broad categories… condenser and dynamic, and it’s pretty important to understand the difference between them.
Condenser or Dynamic?
Most of the mics you’ll run cross are condenser mics, and I’m not going to get into technical nerd detail but essentially a condenser picks up a lot of sound in the room.
Most condensers work best when using a ‘cardiod’ pattern, which is the shape of the area that they pick up sound from. Cardiod looks like a heart (hence the name) and allows just the general area in front of the mic to be picked up, which is good for speaking but they’re still so darn sensitive they’ll still pick up all sorts of stuff all around you, which is annoying in a podcast.
You don’t want to hear your spouse farting in the toilet in the background while you’re talking about the latest development in your field.
Unless you’re in a completely silent space with foam on the walls to deaden sound reflection, I’d stay away from condenser mics.
That’s why I like dynamic mics, because dynamic mics will pick up only what’s directly in front of it.
Because I did not want to fork out almost $400 for the guru recommended “heil pr40”, I unearthed an outstanding dynamic mic available on amazon for about one fifth the cost and virtually the same quality.
This amazing mic is the Audio-Technica ATR2100 and it’s a hidden gem. It’s cheap and even includes the xlr cable and a mini stand. This mic sounds great, and even comes with a USB input if you want to run it directly into your PC instead of through a mixer.
I’ll give a link down below so you can check it out.
Pops and Placement
I’d highly suggest buying a cheap pop filter,fortunately they cost a few bucks, maybe only $10 at most. A pop filter (or windscreen) disburses the air that your mouth fires off when it pronounces “s”, “b”, and “p’s”.
It also helps to point your mouth just a little bit off to the side so that the mic doesn’t get hit directly. Think of the mic as a pretty girl/cute boy and you just ate a slice of garlic pizza… you still want to talk directly to them but you don’t want to unleash something like that at full contact.
Get as close as possible to the mic without touching it! The farther you are from the mic, the more you have to increase the gain or volume level to pick your voice up, which introduces noise… so get up close to it. Look on youtube at how even professionals speak on the radio, their mouths are right up against the mics.
Stands
A swingable stand is a huge convenience, and I use a cheap portable one that works perfect, available on amazon for cheap (linked below). The gurus told me to get the heil stand that costs a fortune, and needs to be mounted, but I found an awesome one on amazon that works fantastic and is portable, so it can mount anywhere quickly. It even comes with an xlr cable built in!
Headphones
Headphones are pretty important as they let you hear the recorded output in real time. When using mixers and recording devices, you’ll need to keep an ear on everything so you can make adjustments as you go. When your guest starts chuckling loudly at your brilliant satire, you might need to tone his butt down so it doesn’t distort the sound until he calms down.
Or if you’ve got a guest with a voice like a mouse, you might need to bump it up a notch or three.
Not only will everything sound cool, but you’ll officially look like a real bona-fide podcaster-er
One problem with many headphones is that they often screw with your sound in an attempt to make it sound better. Usually they’ll add a lot of bass, which is great for listening to music but not so great when you’re trying to hear how it should be through your mixing. You don’t want to think you’ve got this great booming sound when really it’s as thin as a pancake to everyone downloading it.
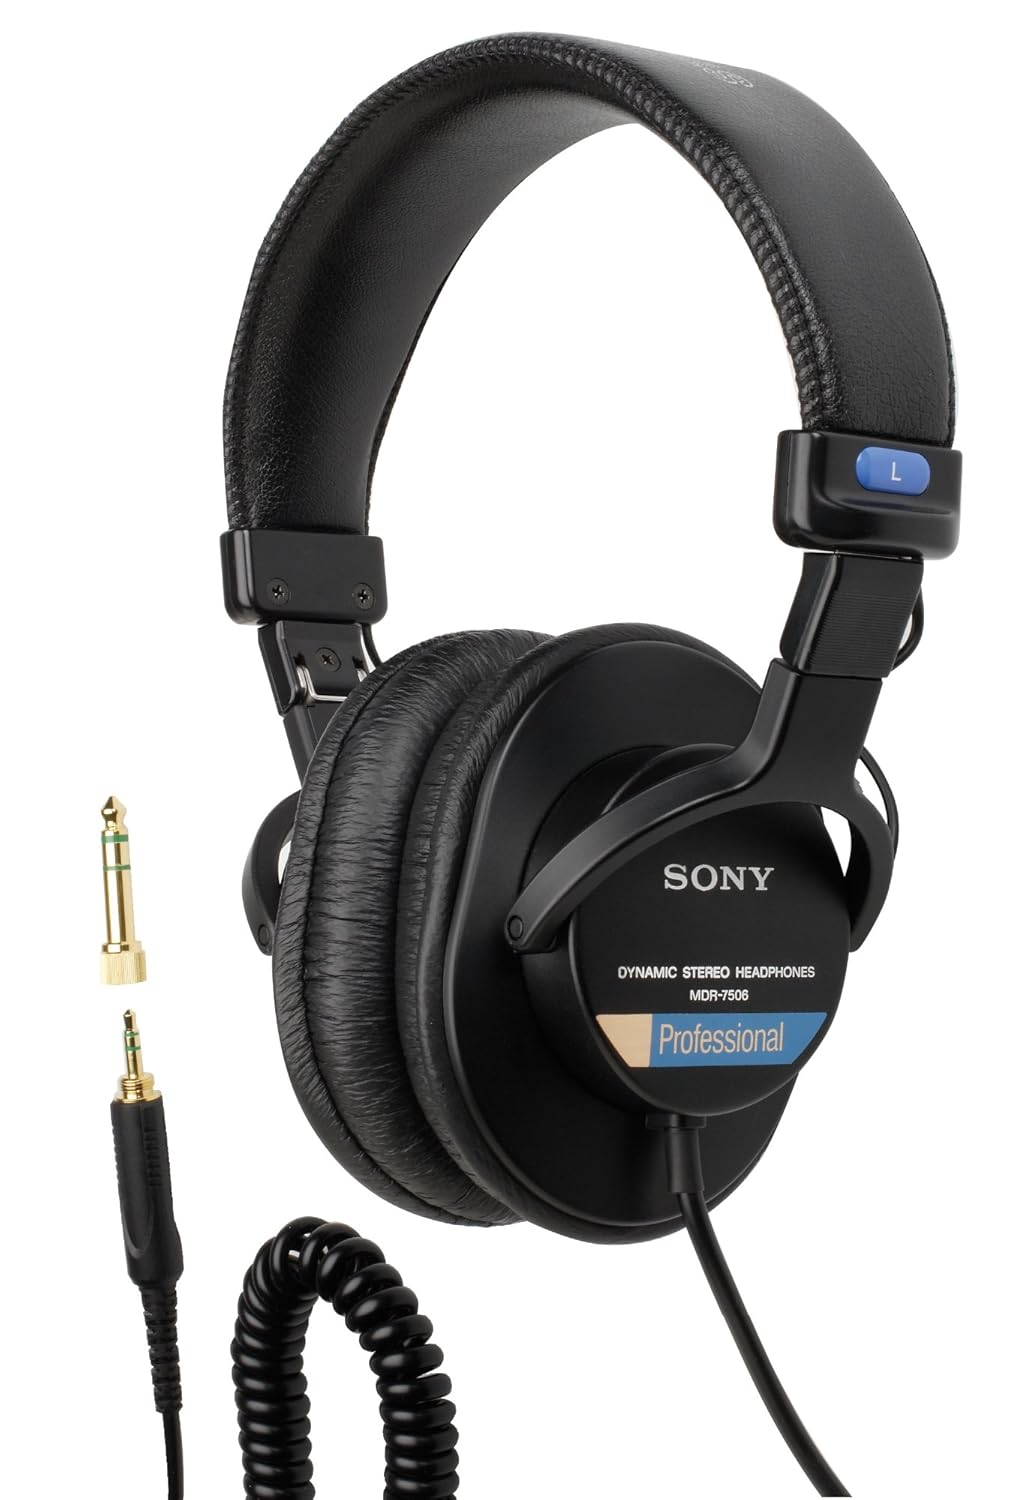
On the cheap, the sony Sony MDRZX100 ZX headphones are good quality and comfortable to wear but I promise you’ll want to upgrade to a real set of headphones soon, because it’ll make a world of difference. I use a more professional set made by Sony that I absolutely love. I’ll link it down below so you can check it out directly.
Hint: while you can plug your headphones into the ‘headphone’ outputs on your mixer, it’s better to plug them into the output of the recording device, because that’s the final destination of your audio.
There’s an art to mixing, and I by no means have mastered it, but have gained an appreciation for sound engineers. Even with just one or two channels of audio to mix, there are so many adjustments to make, such as the sensitivity (gain) of the mic, the volume of the mic (the sliders), and the master output volume sliders, which all directly affect each other. On top of that, the main output is going into the recording device which has its own levels you have to set.
Essentially it just requires some toying around with settings to find what comes out the loudest but not distorted or noisy. If any of you reading this decide to pick up any of these pieces of equipment, I’d be more than happy to answer any questions in the comments below to help you set everything up correctly. Just make sure to ask in the comments rather than by email, since I’d rather it be available for others to benefit from.
Don’t Forget The Intro!
I get a lot of compliments on my podcast, not only on the content but on the production quality as well. One of the things I get complimented on the most is my intro. Everyone seems to love listening to it and repeatedly tell me how professional it makes everything sound.
So I’ll let you in on a little secret… I got it done on Fiverr.com!
I spent a lot of time working on my intro, I had a very clear idea of how I wanted it to sound and what the person’s voice should be like. I figured all this out well before I went searching for a person to do it. Fiverr just made sense as there’s so much talent out there it’s easy to find exactly who you’re looking for.

DJ BryantD, the best you can get f0r podcast intros, sweeps, drops, etc.
In my case, I knew I wanted a catchy hip-hop feel to it so I knew I needed a voice that matched the ‘vibe’. I wanted an african-american, somewhat deep voice, compressed, and with a slight southern accent. As soon as I came across this guy’s samples I knew he’d be perfect.
I gave him my intro script and he returned two versions with the sound effects and everything. Flawless execution, I think I paid like $20 with gig extras.
I added some of the hip-hop music to it to create a catchy beat and that only cost me a few bucks from audiojungle.
It’s amazing that in the past you’d have to spend hundreds of dollars and source local talent to get something as professional done, yet within hours and for less than $30 you can have it done on the internet for you.
I think that’s about it (whew!) so I’ll leave you to ask any questions you might have in the comments below.
If you’d like to check out any of the products I personally use and recommend, you’ll find yourself saving hundreds and hundreds of dollars than what the guru’s are recommending. Not that what others recommend are bad, I just think that what I’ve figured out is by far the best bang for your buck.
Equipment I personally use:
Read the reviews, that’s how I found most of this stuff!
Audio Technical XLR/USB Mic, comes with cable and stand. This mic sounds so good and is so cheap I’ve bought three of them. Apparently the USB port can be kind of rickety but I always use XLR so I couldn’t tell you. I just know this thing sounds magical and comes with the cable, which other mics never do.
Sony Professional Studio Headphones. I love these, I use them all the time. One thing about headphones is that after wearing them for a while they usually get really uncomforable, but these babies feel great even during those long sessions. Your ears (and your listeners) will thank you.
Behringer Mixer with built-in compressor. This thing really is the cats pajamas. Every feature you need built right in, no need for any other piece of equipment that other pros claim you need. Don’t be fooled by the cheap price, this thing is solid and delivers outstanding quality.
Pop Filter Screen. A must-have unless you want to sound like a complete novice on the mic.
Mic Stand. You’ll love having a swinging stand, and it even comes with an xlr cable included, built right into the stand. You simply clamp it on the edge of a table or desk and it’ll move anywhere you want whenever you want. It even comes with a shock mount for mics that can take them.
Recording Device. Not necessary because you can record straight into the PC (the behringer mixer can do that with usb!) but I like to use it just for peace of mind. The built in mic is handy too, you could even podcast directly to the unit using it’s mic and it would sound great.
Any questions you might have, feel free to ask in the comments below… and happy podcasting!
Disclaimer: I am a participant in the Amazon Services LLC Associates Program, an affiliate advertising program designed to provide a means for sites to earn advertising fees by advertising and linking to amazon.com